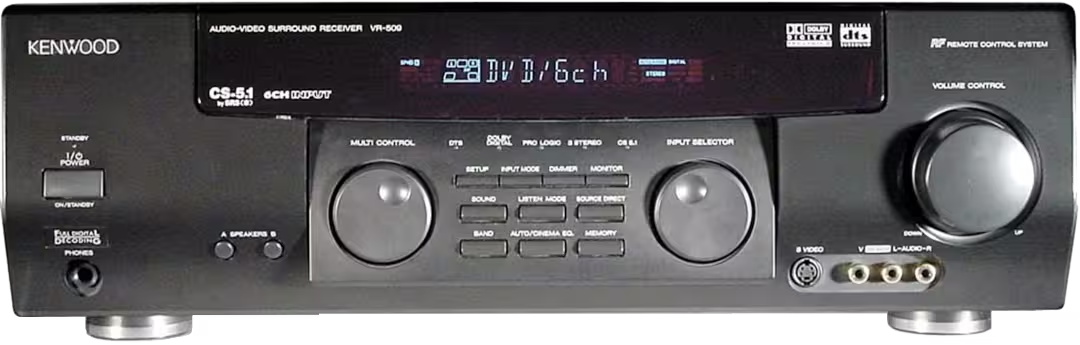
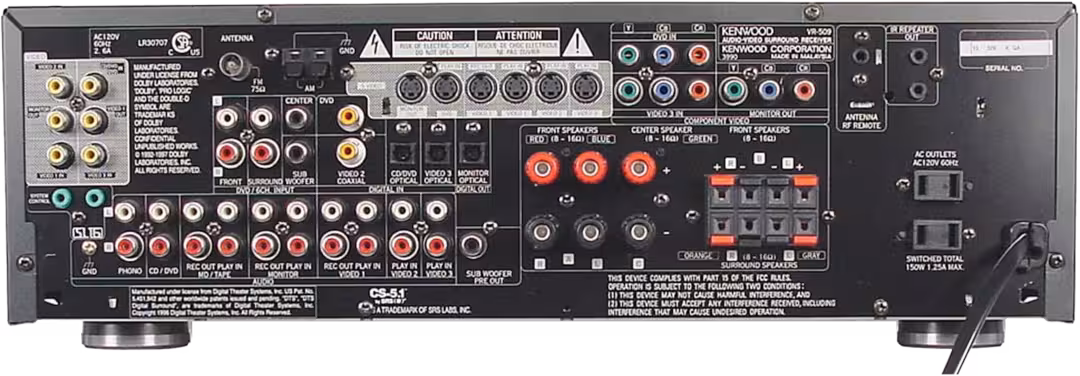
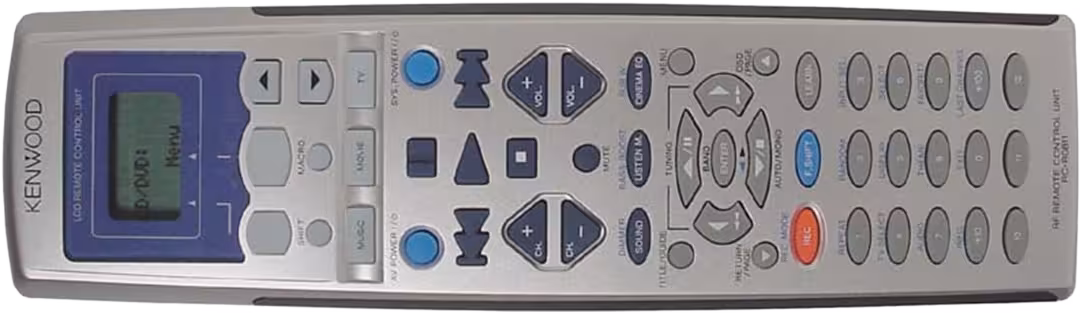
Kenwood Audio Video Surround Receiver VR-509
Initial release circa 2001.
Note
This article serves as a personal archive and therefore should not be treated as an official source.
Documents
Specifications
Warning
Read the specifications carefully to ensure safe operation.
Audio
- Rated power output during STEREO operation
- 100 watts per channel minimum RMS, both channels driven, at 8 Ω from 20 Hz to 20 kHz with no more than 0.7% total harmonic distortion. (FTC)
- Effective power output during SURROUND operation
- FRONT (20-20kHz, 0.7% T.H.D. at 8 Ω one channel driven) 100 W + 100 W
- CENTER (20-20kHz, 0.7% T.H.D. at 8 Ω one channel driven) 100 W
- SURROUND (20-20kHz, 0.7% T.H.D. at 8 Ω one channel driven) 100 W + 100 W
- Total harmonic distortion 0.05% (1 kHz, 50W, 8 Ω)
- Frequency response
- CD 10 Hz ~ 60 kHz, +0 dB, –3.0 dB
- Signal to noise ratio (IHF’66)
- PHONO (MM) 75 dB
- CD 91 dB
- Input sensitivity / impedance
- PHONO (MM) 2.5 mV / 27 kΩ
- CD 200 mV / 47 kΩ
- MONITOR IN 200 mV / 47 kΩ
- DVD/6CH INPUT 200 mV / 47 kΩ
- Output level / impedance
- TAPE REC 200 mV / 1 kΩ
- MONITOR OUT 200 mV / 1 kΩ
- PRE OUT (SUBWOOFER) 1.5 V / 2.2 kΩ
- Tone control
- BASS ±10 dB (at 70 Hz)
- TREBLE ±10 dB (at 10 kHz)
Digital Audio
- Sampling frequency 32 kHz, 44.1 kHz, 48 kHz, 96kHz
- Input level / impedance / wave length
- Optical (-15 dBm ~ -21 dBm), 660 nm ±30nm
- Coaxial 0.5 Vp-p / 75 Ω
Video
- Video inputs / outputs
- Video (composite) 1 Vp-p / 75 Ω
- S Video (luminance signal) 1 Vp-p / 75 Ω
- S Video (chrominance signal) 0.286 Vp-p / 75 Ω
- COMPONENT VIDEO (luminance signal) 1 Vp-p / 75 Ω
- (CB/CR -signal) +/– 0.324 Vp-p / 75 Ω
FM Tuner
- Tuning frequency range 87.5 MHz ~ 108 MHz
- Usable sensitivity (MONO) 1.3 µV (75 Ω)/ 13.2 dBf (75 kHz DEV., SINAD 30 dB)
- 50dB quieting sensitivity
- STEREO 28 µV (75 Ω)/ 40.2 dBf
- Total harmonic distortion (1 kHz)
- MONO 0.5% (65 dBf input)
- STEREO 0.7% (65 dBf input)
- Signal to noise ratio (1 kHz, 75 kHz DEV.)
- MONO 75 dB (65 dBf input)
- STEREO 68 dB (65 dBf input)
- Stereo separation (1 kHz) 40 dB
- Selectivity (±400 kHz) 70 dB
- Frequency response (30 Hz ~ 15kHz), +0.5 dB, –3.0 dB
AM Tuner
- Tuning frequency range
- 10 kHz step 530 kHz ~ 1,700 kHz
- Usable sensitivity 16 µV / (600 µV/m)
- Signal to noise ratio (30% mod. 1 mV input) 50 dB
General
- Power consumption 2.6 A
- AC outlet
- SWITCHED (total 150 W, 1.25 A max.)
- Dimensions
- W : 440 mm (17-5/16")
- H : 144 mm (5-11/16")
- D : 399 mm(15-11/16")
- Weight (Net) 8.8 kg (19.4 lb)
Trouble Shooting
The following is found in the instruction manual section called "In case of difficulty" and refers to specific pages for further information.
Resetting Microcomputer (factory reset)
If the microcomputer may malfunction (unit cannot be operated, or shows an erroneous display) if the power cord is unplugged while the power is ON, or due to some other external factor. If this happens, execute the following procedure to reset the microcomputer and return the unit to its normal operating condition.
Warning
Resetting the microcomputer will clear the contents of the memory and returns the unit to the state it was in when it left the factory.
- Unplug the power cord from the wall outlet.
- While holding down the STANDBY key plug the power cord back into the wall outlet.
Amplifier
| Symptom | Cause | Remedy |
|---|---|---|
| No sound from the speakers. |
|
|
| The standby indicator blinks and sound is not output. | Speaker cords are short-circuited. | Turn the power off, eliminate the short-circuiting, then turn on the power again. |
| Sound is not output from one of the speakers. | The speaker cord is disconnected. | Connect it properly referring to “Connecting the speakers”. |
| Sound is not output from the surround speakers and / or the center speaker, or their sound is very small. |
|
|
| A humming noise is generated when the PHONO input selector is selected. |
|
|
| When playing a Dolby Digital source signal using a DVD player, the sound is cut off soon after it starts. | There are many possible causes for this problem, depending on the type of DVD player used. | Set the input mode to digital manual before starting playback of the Dolby Digital source (page 7). |
| No sound is produced during playback from a DVD player. | The input mode is set to digital manual. | Press the INPUT MODE key to select to digital auto mode. |
| A video source cannot be recorded normally. | The software is copy-guarded. | Copy-guarded video software cannot be recorded. |
Tuner
| Symptom | Cause | Remedy |
|---|---|---|
| Radio stations cannot be received. |
|
|
| Interference. |
|
|
| A station which was preset cannot be received by pressing the corresponding numeric key. |
|
|
Remote control unit
| Symptom | Cause | Remedy |
|---|---|---|
| The battery indicator flashes during operation. | The batteries are nearing exhaustion. | Replace with new batteries to preserve the currently registered setup information (page 17). |
| Subwoofer volume cannot be adjusted. | Subwoofer is OFF. | Turn the subwoofer ON (page 20). |
| Certain inputs cannot be selected using the remote control. | No setup codes registered at for the respective input(s). | Register a setup code or Non-IR code at the respective input(s) (page 33). |
| Remote control operation is not possible. |
|
|